
Lowering DRZ-400
Dialing In Your Stance
The Suzuki DR-Z 400 has earned its legendary status in the dual-sport world for good reason—it’s bulletproof, versatile, and handles everything from fire roads to technical singletrack. However, with a stock seat height hovering around 36.8 inches, the DRZ can feel intimidating when you’re trying to dab a foot on off-camber rocks or navigate stop-and-go city traffic.
For riders with shorter inseams—or anyone wanting a lower center of gravity in technical terrain—an adjustable lowering drop link kit is one of the most effective bolt-on upgrades you can make.
My Setup:
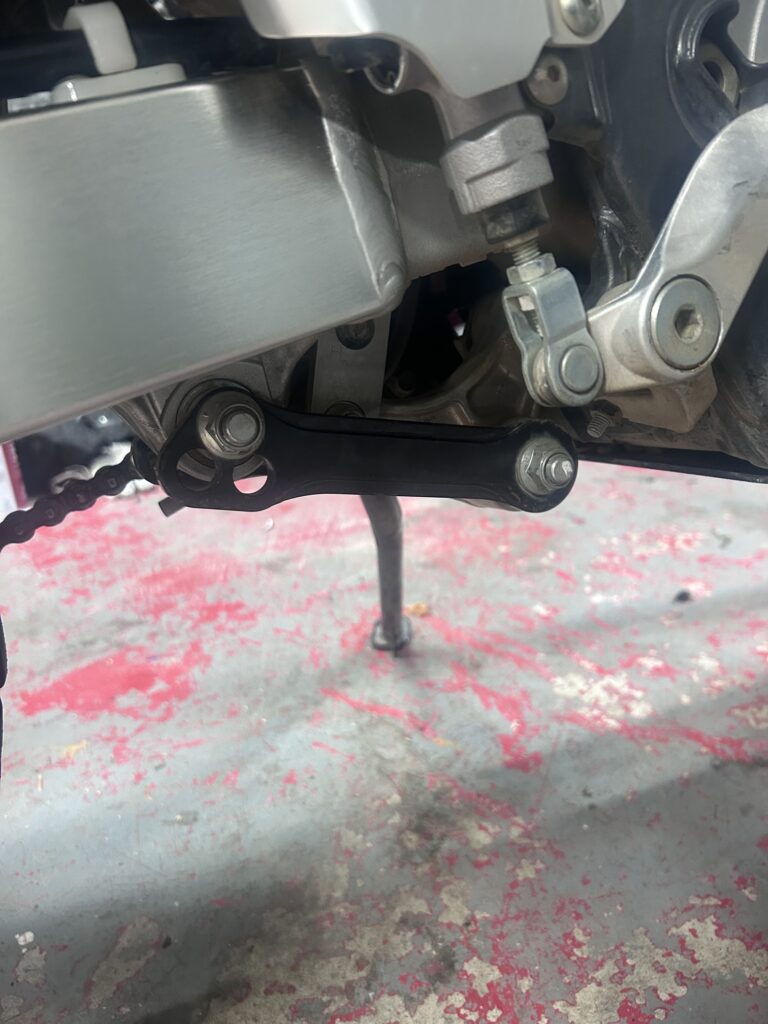
On my own DRZ 400 build, I went with the NiceCNC Adjustable Lowering Drop Link Kit. This kit is built from 45# steel, giving it serious strength and durability for rocky trails without adding noticeable bulk.
What makes the NiceCNC Adjustable Lowering Drop Link Kit especially practical is its dual-position adjustability:
-
1.5-inch drop setting: Ideal for dual-sport trail riding where you want easier footing on technical climbs while preserving plenty of ground clearance and suspension travel.
-
3-inch drop setting: Great for shorter riders or heavy street/supermoto commuting who want to flat-foot at stops.
It bolts straight into the factory linkage points on the DR-Z400S, DR-Z400E, and DR-Z400SM without needing frame modifications.
How Lowering Affects Your DR-Z400S Geometry:
Dropping the rear end of your bike changes more than just seat height—it alters your suspension leverage ratio and rake angle. Keep these three rules in mind when installing a kit:
-
Balance the Front End: If you lower the rear by 1.5 inches without touching the front forks, your bike will feel chopper-like and steer sluggishly. Loosen your triple clamp pinch bolts and slide the fork tubes up in the clamps (typically 0.5″ to 1″, until they approach the handlebars) to keep the chassis balanced.
-
Watch Your Side Stand: Lowering the bike makes it stand much more upright on the factory kickstand. On uneven dirt or gravel, a lowered DRZ 400 can easily tip over unless you install a shortened kickstand or carry a wide puck.
-
Check Rear Fender Clearance: A 3-to-4-inch drop significantly reduces rear wheel travel. If you carry heavy luggage or hit aggressive whoops, check that your rear knobby tire won’t rub the inner fender or tail light assembly at full compression.
- Rider Sag:
Quick Installation Tips:
Swapping the rear linkage on a DRZ 400 takes about 30 minutes with basic hand tools:
-
Support the Bike: Place the bike on a center stand or lift so the rear wheel is barely touching the ground, taking tension off the swingarm.
-
Grease the Bearings: Before bolting up your new links, pack the needle bearings and dust seals with waterproof marine grease.
-
Set Your Sag: Once installed I highly recommend picking up a Slacker Sag Setter and setting both rider sag and static sag to 95–105mm.
Comments
400 DS/ADV Events & GPX Routes
“Click On The State You Want To Ride”
