DRZ 400 DIY Tool Tube

Making your own DRZ 400 tool tube will allow you to adjust the length to your needs and in my opinion it looks better. Here is a step-by-step guide with a few tips to help.
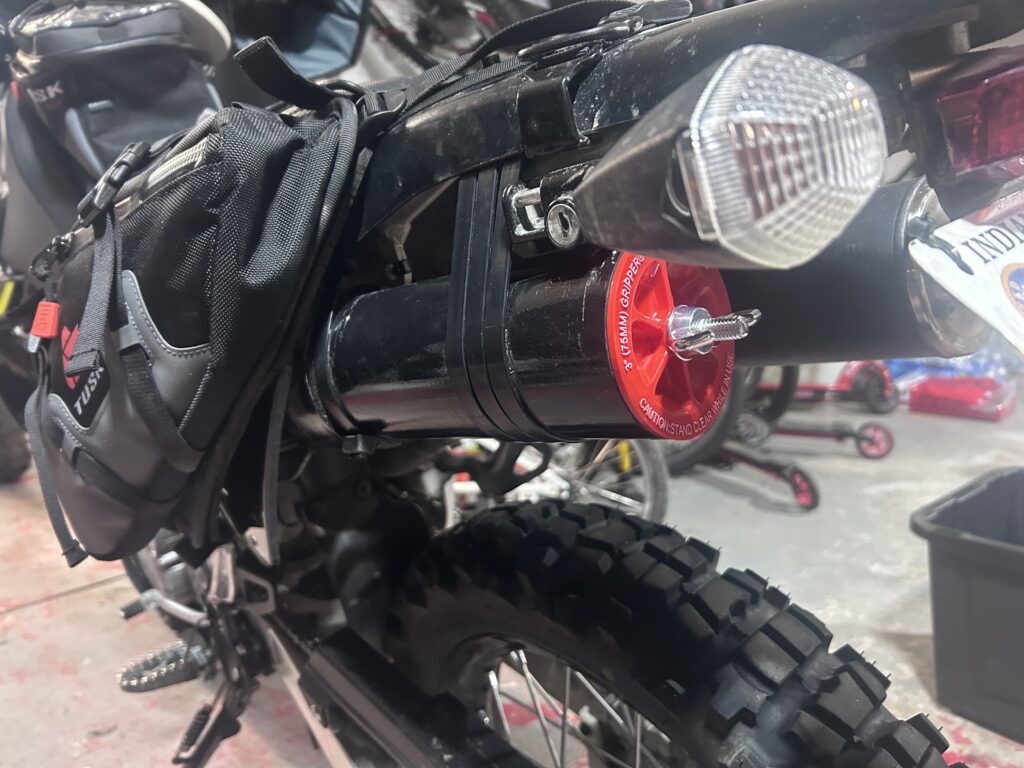
Supplies
- 3″ PVC Tube
- 3″ PVC Cap
- 3″ PVC Gripper Plug- Our Recommendation
- Heavy Duty Zip Ties 20″- Our Recommendation
- PVC Glue
Step-1
Cut 3″ PVC pipe to 10″ or 12″. 10″ will give you an over all depth of 10.5″ and lines up with back side of the helmet lock like shown in picture. 12″ gives you more space and will line up with the end of the stock exhaust. Disadvantage of 12″ is hard to get things out of bottom of canister.
Step-2
Attach PVC pipe end cap using PVC cleaner and glue.
Step 3
Paint PVC tube if desired.
Step-4
Attach Tool Tube to bike using Heavy Duty zip ties around bike sub frame. I found that using 4 zip ties keeps tool tube in place best. 1 towards battery box and 3 as close to the helmet lock as you can.
Step-5
Install 3″ PVC tube quick plug.
Items I carry in my tube-
- DRZ Tool Kit
- Zip Ties
- 10″ Tire tools- Our Recommendation
- Master Link
- Rag
Comments
Add a comment
400 DS/ADV Events & GPX Routes
“Click On The State You Want To Ride”