DIY DRZ Headlight Cover

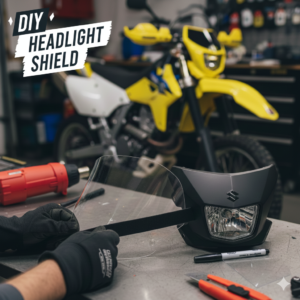
Whether you’re running the stock glass headlight or have made the upgrade to a more powerful Our LED Conversion, protecting your headlight lens is crucial. This step-by-step guide will show you how to easily craft a custom-fit, durable plexiglass shield for your Suzuki DRZ or DR model. Also make sure to check out all our articles on the DRZ-400 Adventure Build.
Items Needed
-
3mm Plexiglass Sheet: 4″ x 8″ -(Buy On Amazon)
-
High Strength Velcro- (Buy On Amazon)
-
Sharp Razor Blade
-
Heat Gun- (Buy On Amazon)
-
Dry Erase Marker
Step-by-Step Instructions
Step 1: Prep the Plexiglass
Cut the 3mm plexiglass sheet down to your required dimensions (approximately 4″ x 8″).
Step 2: Establish the Centerline
Mark the precise center point of the plexiglass sheet. This will serve as your starting reference for bending and alignment.
Step 3: Heat and Soften
Using your heat gun in vertical position, carefully and evenly heat the plexiglass. Caution: Apply heat slowly and consistently to make the material to soft. The goal is to make the plexiglass pliable.
Step 4: Mold the Shield
While the plexiglass is warm and flexible, gently press and mold it directly against the curvature of your DRZ/DR headlight mask. Hold it in place until the material cools and retains the desired curve.
Step 5: Mark for Velcro Placement
Place the newly molded shield back onto the headlight mask. Use your marker to identify and mark the precise areas where the headlight mask overlaps the shield. These marked areas are where the Velcro strips will be attached for a secure fit.
Step 6: Apply and Trim the Velcro
Affix the industrial-strength Velcro to both the marked areas on the plexiglass shield and the corresponding spots on the headlight mask. Trim any excess Velcro for a clean, seamless look that fits within the shield’s edge.
Step 7: Install Your Headlight Shield
Carefully align the shield and press it firmly onto the headlight mask to engage the Velcro. You now have a custom, easily removable shield that offers excellent protection for your headlight!
Join Our DRZ-400 Email List
Comments
Add a comment
400 DS/ADV Events & GPX Routes
“Click On The State You Want To Ride”